
There are a lot of apps (and people) that will assist you in formatting a book for publishing, and it’s not the goal of this post to talk you out of using them, but if you’re only doing an eBook through KDP, a lot of formatting is either wasted (Kindle ignores it) or comes out looking wonky depending on the device, resolution, etc.
A nice thing about eReaders is they’re accessible. People who have trouble reading due to vision issues or dyslexia can change the size or style of the font to create the best reading experience for them. Forcing a certain format can defeat that purpose. Sometimes less formatting is more helpful.
So if you’re on a budget or you’re a do-it-yourself type or you just want to impose the minimum formatting restrictions on Kindle and its users, here’s a quick rundown of how to format your book before submitting to KDP.
The screenshots will be Word for Windows, but all of this should work in Word for Mac with some translation.
Step 1 – make a backup
Always a good first step to anything! In case you bungle these steps or hate the outcome, please make a copy before starting.
Next, scroll through your document and make a note of any paragraphs that are intentionally formatted differently. For example, chapter headings or maybe a block of text to indicate a text message conversation. We’re going to be wiping all that formatting out, so yes! the backup is important.
Step 2 – apply Normal style throughout
We’re only going to use a few styles in Word. The most important one is the Normal style. To start, select all the text in your document (Ctrl-A) and apply the Normal style to it. Click on the Home tab, then click on Normal from the list of styles.

Don’t worry about what this looks like right now. We’ll get to that. What it should look like is all the same with the exception of individual words that have been italicized (or bolded or underlined, but don’t use bold or underline in a novel).
If there are any sections that still look different (i.e. different line spacing or indenting or fonts), you’re going to have to go nuclear on them. Going nuclear will also eliminate those italics applied to individual words, so make note of them and reapply after.
How to go nuclear (hopefully not required): select the entire paragraph that appears different and go to the Styles list, click the More drop down arrow, and pick Clear Formatting.

Step 3 – Modify Normal Style
OK, now that all your text looks the same (that step was important to clear out unintentional paragraph-level formatting you may have done), we’re going to modify the Normal style to match Kindle’s default display. This isn’t really necessary, but it’ll help us understand what readers will see if they haven’t changed any of their settings.
The default text style is Times New Roman, 12 point, fully justified, single spaced with no extra spacing between paragraphs and with the first line of each paragraph indented half an inch. This is a very readable style and there’s no reason for you to try to force Kindle to do something different, but it’s not Word’s default style, so let’s update the Normal style so Word and Kindle match.
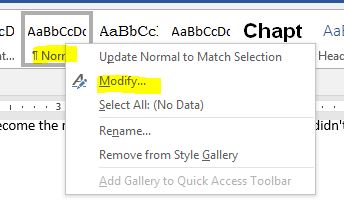
On the Style ribbon, right click on Normal and select Modify.
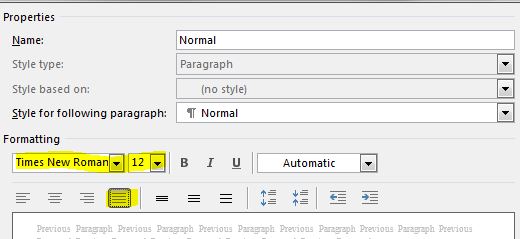
Set the font (Times New Roman, 12 points, fully justified)
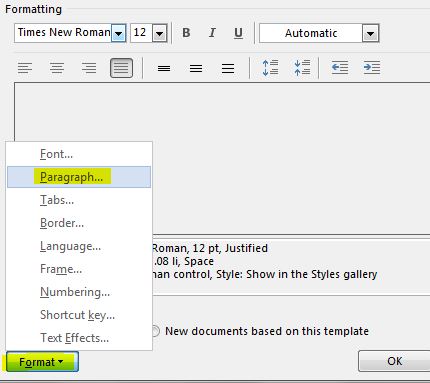
To change the spacing and indents, click the Format button and pick Paragraph from the pop-up menu
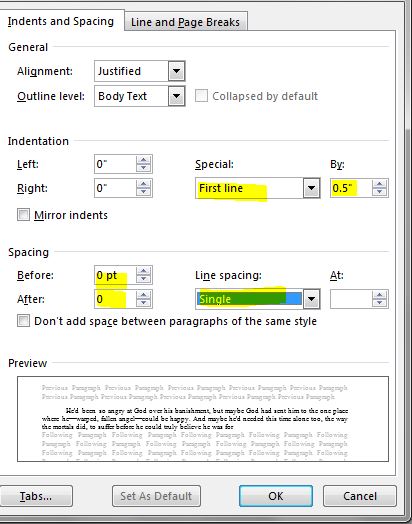
Set the indents and spacing (First line indent by .5″, 0 spacing before and after and single line spacing)
Click OK and OK again. You should be back in your document with the entire document formatted as described.
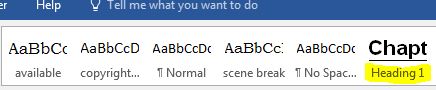
Step 4 – apply Heading 1 style to chapter headings
Go to each chapter heading and apply the Heading 1 style to it. Don’t get creative here. Use the built-in Heading 1 style or I promise there are repercussions.
Now, modify Heading 1 to make it look the way you want your chapter headings to look by right clicking on Heading 1 and picking Modify as we did above for Normal. You can get more creative with the formatting for Heading 1, but not everything will translate to Kindle. You’ll have to do some trial and error if you want to be fancy.
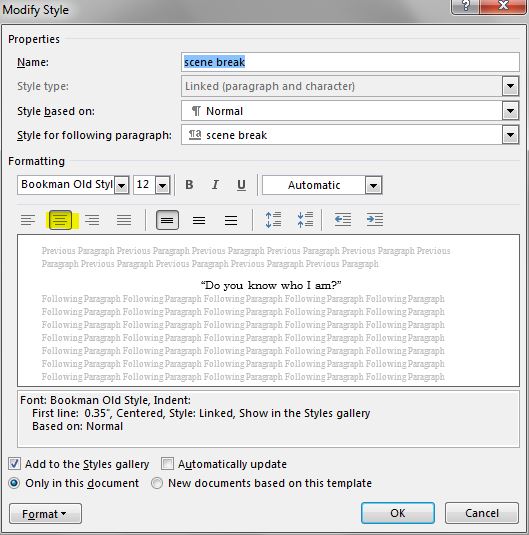
Here’s a format I use that comes over well (that’s a sneak peek at the first paragraph from my Satan fanfic short):
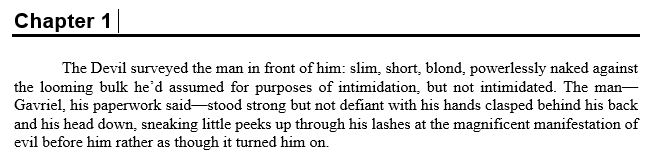
Here are the settings I use: Arial (the more obscure the font, the less likely it’ll appear the way you think it will), 16 points. The line underneath is made by selecting Border from the Format menu and and putting a border at the bottom that’s 2 1/4 points.

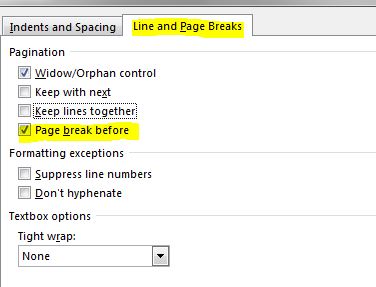
To ensure that your chapters always start on a new page, go to the Line and Page Breaks tab and check the button for “Page break before”
Step 5 – create and apply other styles as needed
In your scan-through, before you wiped all the formatting out, did you notice any other intentionally-different paragraphs? For instance, you might have subheadings or scene breaks or paragraphs that are set apart to designate a text exchange. We will create and apply a style for each TYPE of paragraph you have other than Normal and Heading 1.
If you have subheadings, you can use the Heading 2 style that’s built-in (required if you’ll want them to appear in a Table of Contents), but otherwise, it’s safest to make a brand new style.
Let’s start by going to the first instance of this new style in your document. Apply formatting to it right there in your document until it looks the way you want it to. Now, go to the Styles ribbon, click the More drop down arrow, and select Create a Style
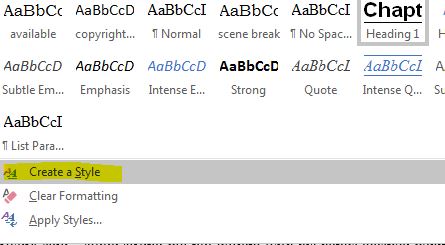
Give the style a name and click OK. Now, go to each spot in your document that should look the same and apply that style to it. Repeat this for each different kind of paragraph in your document.
If you change your mind about how a style should look, right click on the style name in the Style ribbon and select Modify. Don’t just change it in the text because that will only change it in that one place and Kindle will probably ignore the change anyway. Modify the style.
Important note: clicking the center icon on a paragraph won’t reliably show it as centered on Kindle! You need to create a style and use the Center icon on that Modify Style dialog.
Step 6 (optional) – adding a Table of Contents
Go to the spot in your document where you want the TOC to appear and type the words “Table of Contents.” Apply the Heading 1 format to it. Press enter so your cursor is below the heading.
Go to the Reference tab and click Table of Contents (1st icon) and pick Custom Table of Contents

Uncheck Show page numbers and click OK. Your TOC will appear. It’ll only look like a list of chapter titles but if you hover over them, you’ll see a pop-up that says “ctrl click to follow.” Kindle will know how to handle this.
Step 7 – proofread again
Yeah, sorry. This should always be your last step when you make big changes to a document. For this last pass, I suggest you make a drastic change to your paper size or margins. Kindle won’t care about those changes, but they can help you see your document with fresh eyes and flush out any spots where you may have accidentally put in a hard line break, because the words will wrap in a new place, making those hard returns more obvious.
Using a smaller paper size will also make it obvious where your paragraphs are too long. Paragraphs on Kindle look longer than paragraphs in print and long paragraphs are daunting. If it takes up half the page, break it up.
From the Layout tab, pick Size, then More Paper Sizes
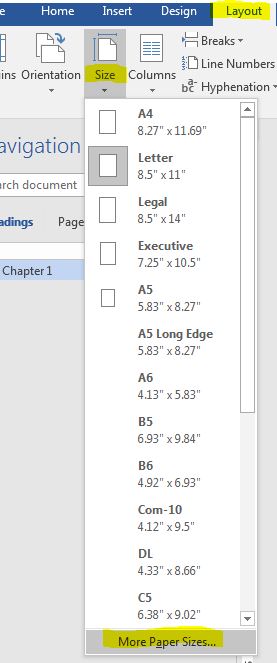
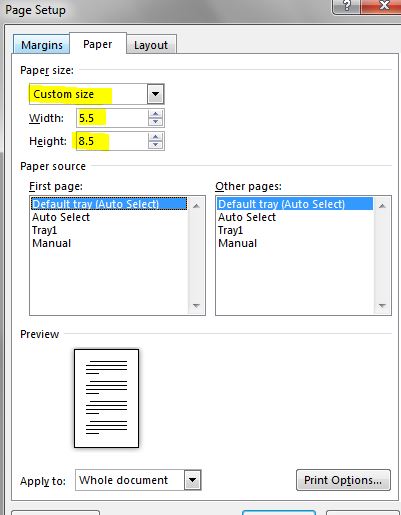
Pick Custom for the paper size and set it to something like 5.5″ by 8.5″
That’s it! You’ll upload the Word .doc file directly – no need to convert into any other format.
I hope this was helpful. If you leave feedback here or on social media, I could be persuaded to talk about formatting back matter to include images and links. I’m also willing to answer questions or expound on any topic.
Remember to use the online previewer on KDP before clicking submit (I do one last proofread of the whole document that way, personally) and to try some of the different device options from that menu they give you.
Happy formatting!